
Tips for baking the perfect scones
Making homemade scones is one of the quickest and easiest bakes you can master at home with a little practice. Dish up the perfect afternoon treat with a batch of flawless scones and a cup of tea. Simple to make, great scones are all about mastering these essential principles – and then you’re guaranteed light and crumbly scones!
Tips for baking the perfect scones
If you’re wanting to perfect your scone game read on to see our top 10 recommendations
What is a scone?
An essential to afternoon tea, the classic scone is a perfectly easy tea-time treat enjoyed by all.
Scones are thought to have originated in Scotland in the early 1500s and the first known print reference was made by a Scottish poet in 1513. Scones were originally made using oats, shaped into a large round and scored into four or six wedges. They were then griddle baked over an open fire, although today’s versions are made with flour and baked in the oven. The word is thought to have originated from the Dutch “schoonbrot,” meaning fine white bread; and the closely related German “sconbrot,” which means fine or beautiful bread.
Baking tips for making the perfect scones
- Use cold or frozen butter: For a better rise, preferably use cold butter or even frozen butter. Frozen butter can be a nuisance to cut so we advise grating with the fine side of a cheese grater first. The colder the better when it comes to scones, we recommend a chilled bowl and pastry cutter too.
- Use pastry flour: This will create a noticeably lighter scone. However, self-raising flour works just as well and creates a higher rising scone that holds its shape nicely. Don’t add too much flour to the surface when you roll out your dough, it’s easy to forget that flour on your work surface still adds to the dough, which can make the scones heavier.
- Mix the butter into the flour: If you don’t start by mixing the flour and butter, your scones can fail to form properly. However, there’s another thing to keep in mind, the butter has to remain solid while making the scones. If the butter melts completely it will become more bread-like than scone-like.
- Avoid using a food processor to mix scones: A food processor will work, but it often overworks the scone dough. We recommend using your hands until the mixture comes together. Overworking the dough will lead to scones that are tough and chewy, rather than light and flaky. The less you knead the mix, the less the gluten will tighten up – which means your scones will stay loose and crumbly, rather than tight and springy. Expect your dough to have lumps and bumps in it — once it just comes together, it’s ready to be used.
- Keep the dough cool: As previously mentioned, it’s crucial to keep the dough cold so that the butter doesn’t melt before the scones are baked. With chilled dough, you’ll have pockets of butter in the dough (this is a good thing!) that create a super-flaky, oh-so-delicious end result. For extra precaution, it helps to chill the dough again before it’s baked.
- If you are using fruit, make sure to drain it well: Be sure to drain your fruit very well. If you’re using frozen fruit, don’t thaw it out before you add it into your mixture, but do of course break apart the frozen chunks of fruit into smaller pieces.
- Add more buttermilk if the dough is too crumbly: If the dough is so dry that some of the flour won’t stick, add a bit more buttermilk or water.
- Add more flour if the dough is too sticky: If the dough is too sticky to knead, more like a batter consistency, add more flour by the tablespoon until the correct consistency is achieved.
- Keep scones cold before putting them in the oven: For best results, chill the mixture in the fridge before baking, this will help to stiffen up the butter again, which will stop your scones from slumping as soon as they hit the oven’s heat.
- Freeze unbaked scones: Scones are rich enough that they freeze very well unbaked. You don’t need to thaw them completely before baking, just let them sit on the baking sheet while the oven is heating to start to take the chill off.

Common questions about scones
- Can you freeze scones after baking? Yes, scones freeze well. Let them cool before freezing. Place in an airtight container to protect them from freezer burn. Enjoy them within 3 months!
- Can you make scones without baking powder? A final crucial ingredient in scones is some sort of leavening agent such as baking powder. Be sure to sieve this into the mixture evenly for a better chance of an even rise. In the oven, these leavening agents will react and form carbon dioxide, a gas. This puffs up your scone, it’s why it increases in height in the oven!
- Should I use salted or unsalted butter for scones? Both salted butter and unsalted butter can be used, it’s all down to your personal preference.
- Can you make scones without butter? You can use canola oil or vegetable oil to replace the butter in a scone recipe. It’s possible to use almond butter instead of standard butter too.
- Can you use plain flour for scones? Yes, however we also recommend using 3 teaspoons of baking powder to ensure the scones rise.
- How to keep scones fresh? Home-made scones generally last 2 days stored in an airtight container, any longer and they can become a bit dry. If storing scones in the fridge they will last for about a week.
- Why do my scones lean to one side? This is usually caused by twisting the cutter when cutting the scones out. Make sure to push straight down and don’t twist the cutter at all. It can also be caused by the dough being uneven when you pat it out.
- How to make scones rise high? Once you’ve cut out your scone shapes, flip them over and place upside down on the baking tray. This will help them rise evenly and counteract any ‘squashing’ that happened when you cut out the dough. Perfect scones should rise to about 2 inches high. If your scones aren’t rising, you’re probably doing something wrong in the method. This can happen due to various reasons, including:
- Not using enough leavening agent
- Placing scones far away from each other on the baking tray
- Not preheating the oven before putting in the scones
- Low-quality ingredients
Our recipe for the perfect classic scones
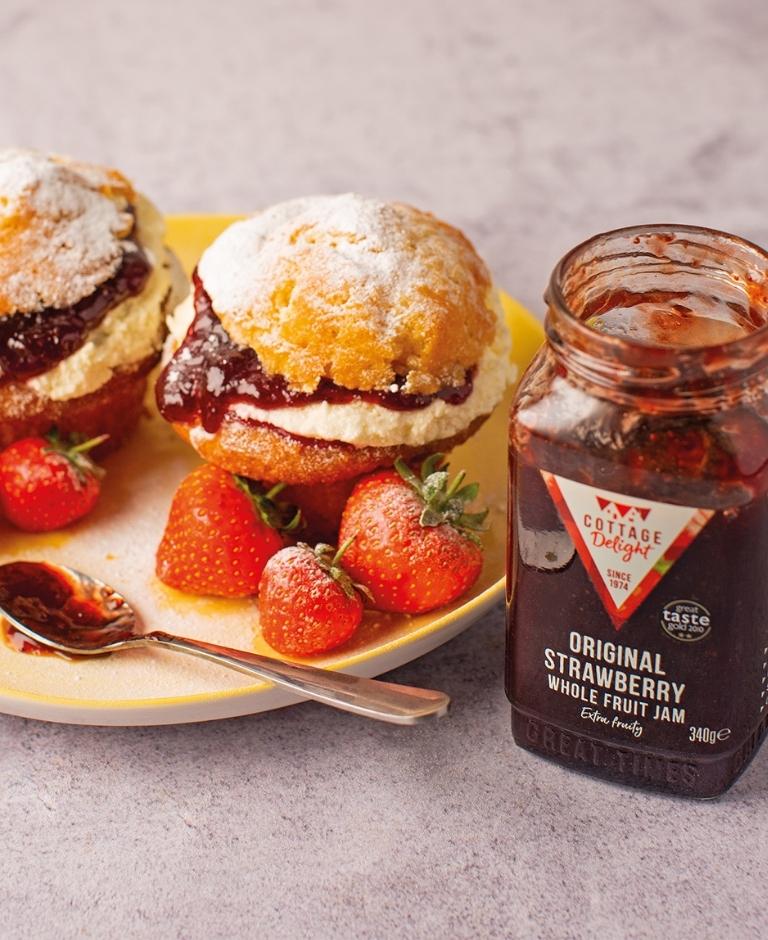
A delightful recipe for the perfect classic scones, dollop with our Classic Clotted Cream and Original Strawberry Whole Fruit Jam
Ingredients:
- 225g self-raising flour
- 55g chilled butter
- 1 level tsp baking powder
- 1/2 tsp salt
- 150ml milk
- 1 egg lightly beaten with a little milk
- To serve: Original Strawberry Whole Fruit Jam
- Classic Clotted Cream
Method:
- Pre-heat oven to 205°C (fan), grease and flour a baking sheet.
- Sieve the flour into a large mixing bowl then add the butter, baking powder and salt. Rub together quickly and lightly to a fine breadcrumb consistency.
- Using a metal knife, make a well in the centre and stir in enough milk to make a soft dough. Knead lightly on a floured board and roll out to approx. 2cm / 3/4 inch thick.
- Use 3inch cutter for perfect rounds and brush with a little beaten egg.
- Pop back in the fridge to chill for 30 mins
- Remove from fridge and bake for 15 minutes or until golden brown
- Let cool and serve with delicious Original Strawberry Whole Fruit Jam and Classic Clotted Cream
- For fruit scones add 500g sultanas or chopped dates to the dry ingredients or try savoury scones by adding 50g grated cheese and 1/2 tsp dry mustard powder to the breadcrumb mixture. Sprinkle with more grated cheese before baking.

PRODUCTS USED IN THIS BLOG
Take a look at our perfect scone accompaniments
-
 Classic Clotted CreamProduct on saleOriginal price was: £5.99.£1.99Current price is: £1.99.
 -
 Original Strawberry Whole Fruit Jam£4.89
Other blogs you might like to read